Integrating Salesforce is a simple and effective way to create an Ideal Customer Profile, create audiences, and synchronize your CRM data with the platform.
Our patented machine learning algorithm enriches Salesforce data to pinpoint target companies and contacts.
All opportunities and revenue associated with leads generated from campaigns run through the platform will be synced back. The system reads the default contact, opportunity, and account objects in Salesforce to show attribution.
Lastly, the integration also allows building audiences (static or dynamic) from accounts and opportunities fields in your Salesforce. This helps minimize manual and repetitive tasks such as downloading and uploading CSVs.
Checklist to Prepare Your Account for Salesforce Integration
Step 1 - Edition
Ensure that your Salesforce edition has API access. The following editions include API access:
Enterprise Edition
Unlimited Edition
Developer Edition
Performance Edition
The following editions do not have API access:
Contact Edition
Group Edition
Professional Edition
Step 2 - API Enabled
Please ensure that API is enabled at the user or permission set level.
How to enable API Access in Salesforce by Profile:
Click Setup.
In Quick Find, search for "Profiles".
Click Users > Profiles.
Select your profile from the list and click "Edit".
Scroll down to System Permissions and select System Permissions.
Click Edit Properties and ensure that API Enabled is checked.
Click Save.
How to enable API Access in Salesforce by Permission Set:
Click Setup.
In Quick Find, search for "Permission Sets".
Click Users > Permission Sets.
Select the specific Permission Set.
Click System > System Permissions > Edit and check the API Enabled box.
Click Save.
Learn more about enabling API access
Note: For information on the Salesforce APIs Metadata connects to, please read this FAQ.
Step 3 - Permissions (Fields)
Your user account needs at least the following permissions:
View All Data contained in specific object and system fields. Click here for details.
API Only User
For Accounts & Opportunities, ensure that any custom fields you want to build audiences on are available to the logged-in user.
To validate that permissions have been set accordingly, navigate here, click New Salesforce Criteria and search for the field. If you don't see the field, the user logged into the integration lacks permissions to see it.
Step 4 - Connect Salesforce and Metadata
Go to the Integrations page.
Click Connect in the CRM box.
Select Salesforce.
Click Next.
Click Connect.
Enter your Salesforce username and password.
Click Log In.
To disconnect, go to the Integration page, click Settings, and select Disconnect.
Note: If you face any issues with the Integration please try incognito mode as that may help to ensure the connection is successful. Reach out to support@metadata.io if you continue to face any issues.
Does Metadata Use a Connected App?
Yes. Metadata connects to Salesforce through OAuth 2.0 using Metadata's own connected app — there is nothing to create or configure in your Salesforce org before connecting.
When you click Connect and log in, you are authorizing Metadata's connected app with the full and refresh_token OAuth scopes.
Sandbox orgs are supported — authorization runs through test.salesforce.com instead of login.salesforce.com.
Metadata refreshes access tokens automatically, so you won't need to re-authenticate unless the connection is revoked.
After connecting, your Salesforce admin can view, restrict, or revoke the app under Setup > Connected Apps OAuth Usage.
Troubleshooting OAuth Connection Error
Please note while connecting you may face this error
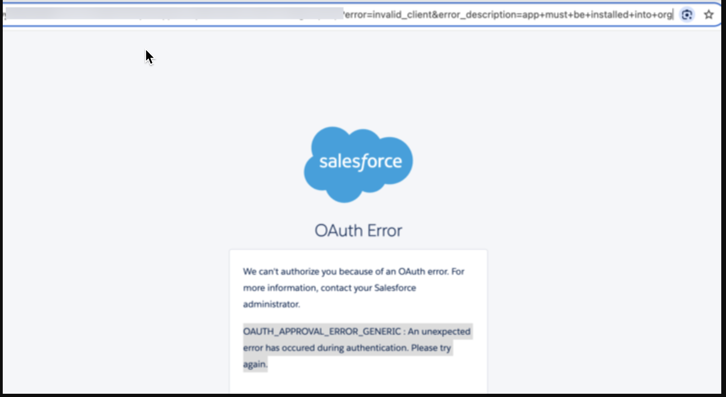
The user connecting needs to have the following permissions enabled: Approve Uninstalled Connected Apps. Without this permission enabled, this error will be returned.
More details: https://help.salesforce.com/s/articleView?id=005132365&type=1